Outdoor Coffee Table
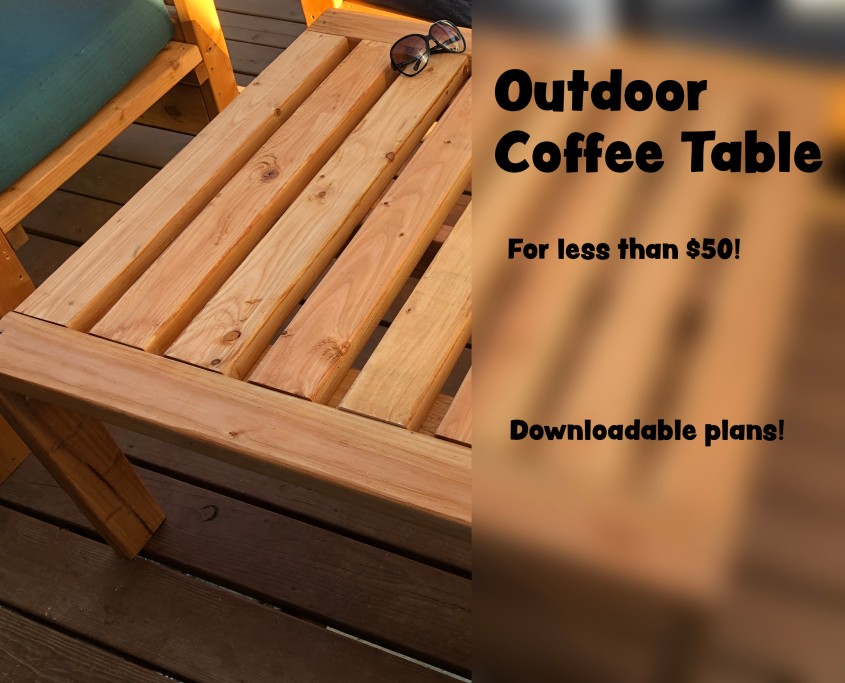
Here’s my first stab at posting a wood working plan! This is a coffee table I built for my back deck. It goes with a sofa and sectional plan I will post shortly. I also made it to go with two chairs I made based on these plans by Ana White.
This table is made just from 2x4s I picked up at Home Depot! I found them for less than $5 each. I just made sure to check for straightness and to avoid boards that had large sections of imperfections.
This is a pretty easy weekend project, and for less than $50 for all supplies, it’s a pretty good deal!
The plans I used are below. You can also download them here (in PDF): Outdoor Coffee Table Plans.
Disclaimer: I’m not a professional woodworker. The piece seems sturdy and I’m sure there’s a better way to do it than the way I did it, but I think it turned out pretty well!
Dimensions: 1′ 6″ H x 3′ D x 3′ W
Tools & Materials
- 2 1/2″ self-tapping decking screws
- Pocket hole jig (optional, if you want to hide screws)
- L-Brackets (optional, if you want to hide screws)
- Miter saw or circular saw
- Drill
All lumber dimensions are the nominal sizes (not actual dimensions). I’m describing them as 2x4x[length] – for example, 2x4x8 means a 2×4 board that is 8′ long. 2x4x6 means a 2×4 that is 6′ long.
Measurements are all actual measurements.
Lumber Requirements
| Lumber | Qty | Est Cost Each | Total Est Cost |
| 2x4x8 (96″) | 6 | $5 | $30 |
| 2x4x6 (52″) | 1 | $4 | $4 |
Cut List
| Letter | Description | Qty | Length | Material |
| A | Table top frame stiles | 3 | 2′ 5″ (29″) | 2×4 |
| B | Table top frame rails | 2 | 2′ 9″ (33″) | 2×4 |
| C | Table leg | 4 | 1′ 4 1/2″ (16.5″) | 2×4 |
| D | Apron | 2 | 2′ 9″ (33″) | 2×4 |
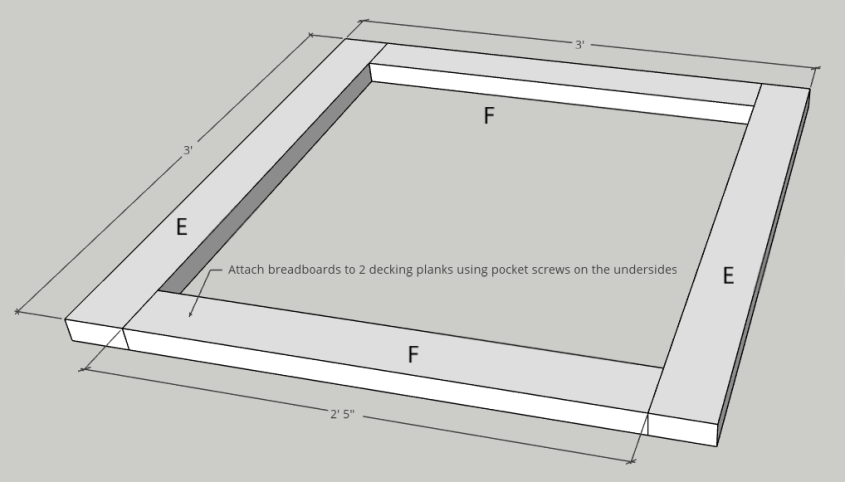
| E | Breadboard (table top ends) | 2 | 3′ (36″) | 2×4 |
| F | Table top decking planks | 8 | 2′ 5″ (29″) | 2×4 |
Cutting Instructions
| Board # | Dimension | Cuts to Make | Comments |
| 1 | 2x4x8 |
|
|
| 2 | 2x4x8 |
|
There is only 1″ remainder here – cut carefully! |
| 3 | 2x4x8 |
|
|
| 4 | 2x4x8 |
|
There is only 1″ remainder here – cut carefully! |
| 5 | 2x4x8 |
|
|
| 6 | 2x4x8 | 3 – 29″ (F) | |
| 7 | 2x4x6 | 1 – 29″ (F) | You will have leftovers. |
Note: In board 7, if you want the spacing of the planks in your table top to be narrower than called for, you can cut an extra 29″ plan from this left over piece.
Recommendations
- Pre-finish boards with outdoor decking stain. I used Flood CWF-UV Penetrating Finish in Cedar. I used it on all the patio furniture pieces I made, and they all go together! Pre-finishing the boards saves you a headache later when you’re trying to get the applicator in between the planks. I applied it with a broad foam applicator. A thin coat took only 20 minutes to dry to the touch and I was able to assemble the pieces without waiting too long. Plus, it cleans up with soap and water. You can also wipe drips right off the wood!
- Drill pilot holes for all your screws. This will help prevent the wood from splitting. I spaced all my screws at least 3/4″ in from the edges of each board.
- I used clamps to hold boards together and flush while I was drilling.
- If you’re not sure how to do pocket screws, don’t be afraid! I bought a Kreg Mini Jig off of Amazon and watched a couple YouTubes. It’s easier than it looks!
Short Steps:
- Assemble the table top frame
- Assemble the table legs
- Attach the frame to the legs
- Assemble the table top
- Attach table top to frame
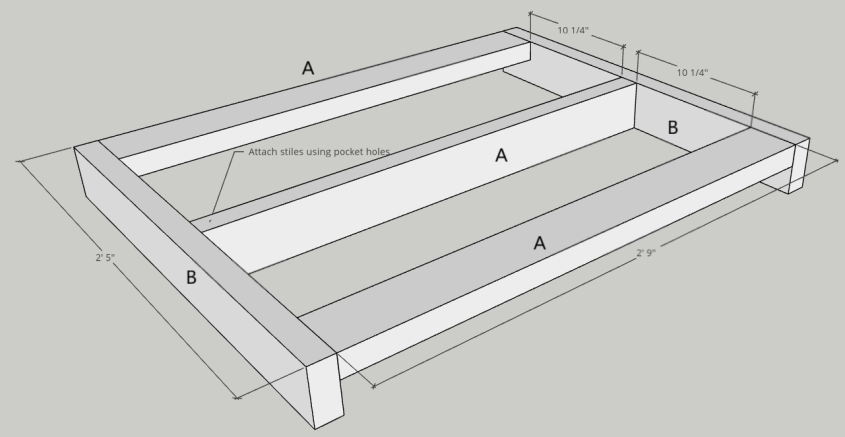
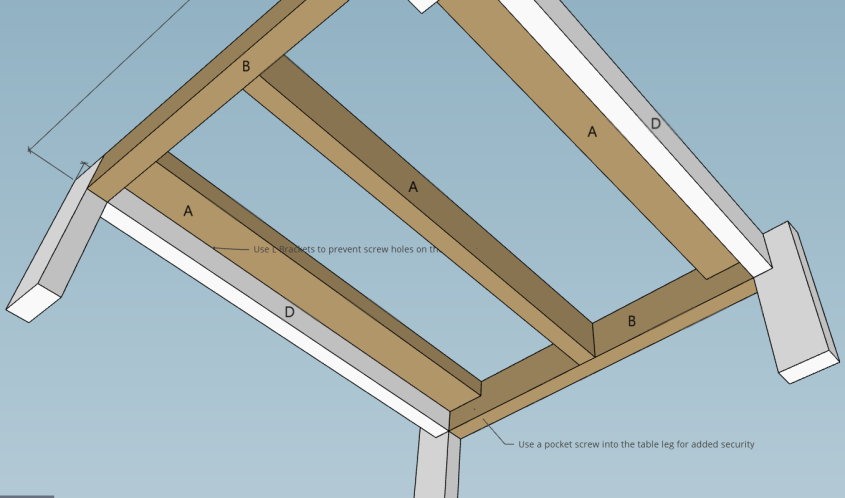
Step 1: Create table top frame
|
Fig. 1: Create table top frame
|
|||||||||||||||
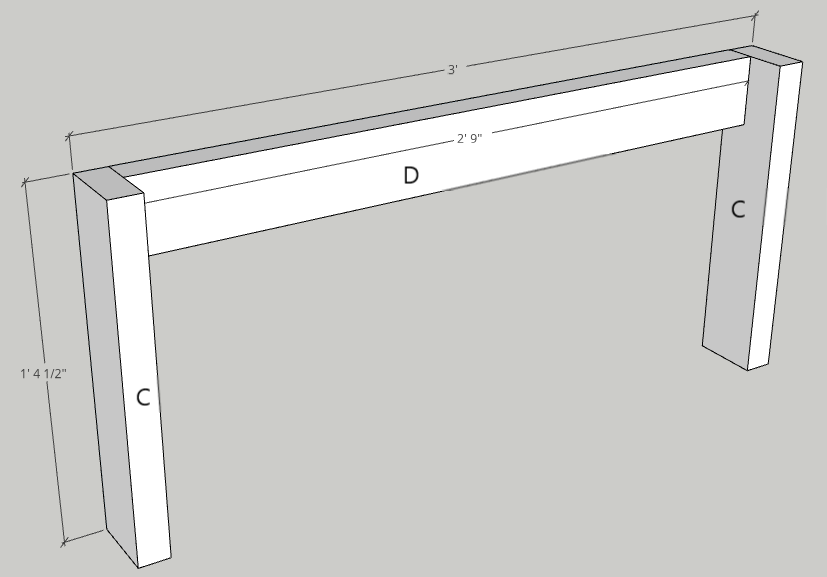
Step 2: Assemble the table legs (2)
|
Fig. 2: Assemble table legs (create 2)
|
|||||||||||||||
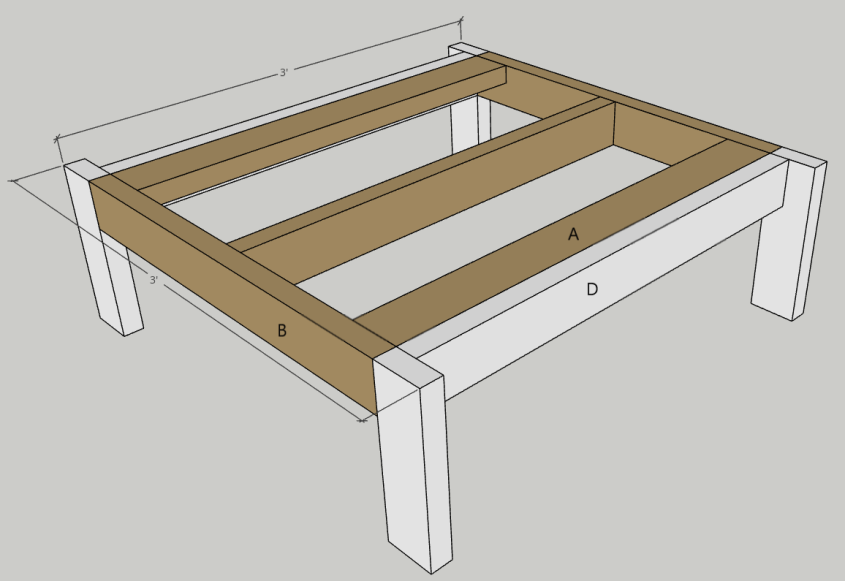
Step 3: Attach the table top frame to the table legs
|
Fig. 3: Attach table top frame to legs
|
|||||||||||||||
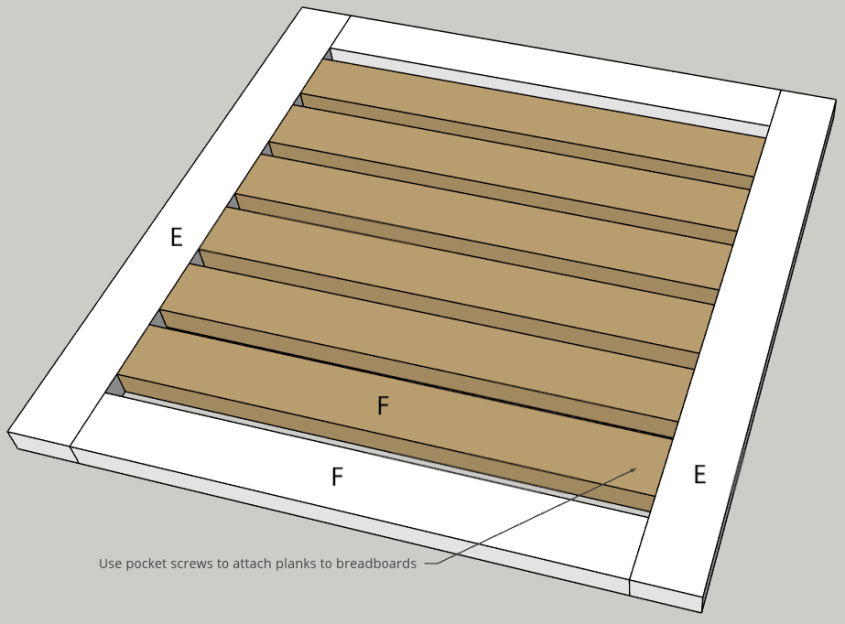
Step 4: Assemble the table top
|
Fig. 4: Attach two decking planks (F) to the two breadboards (E)
Fig. 4a: Attach remaining decking planks
|
|||||||||||||||
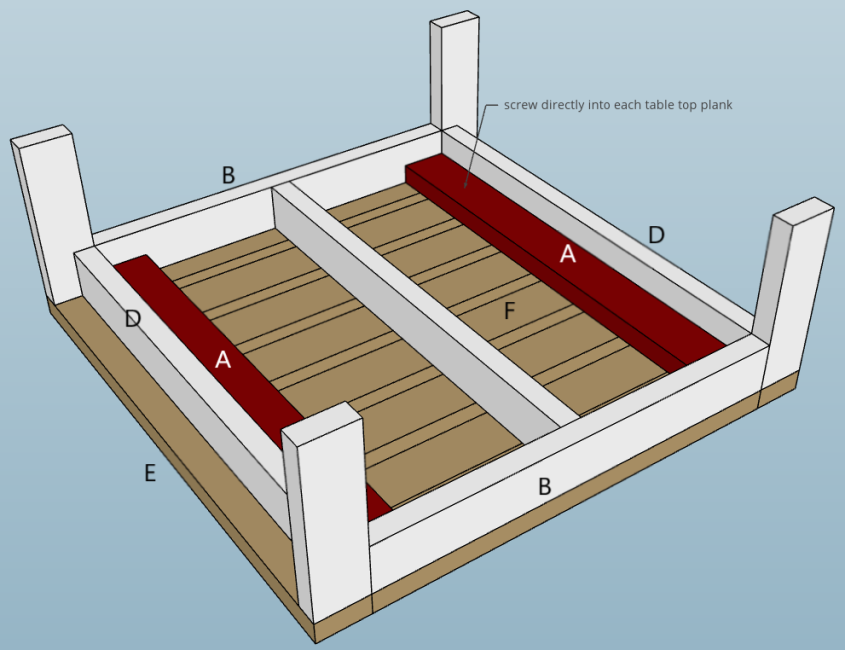
Step 5: Attach table top to table frame
|
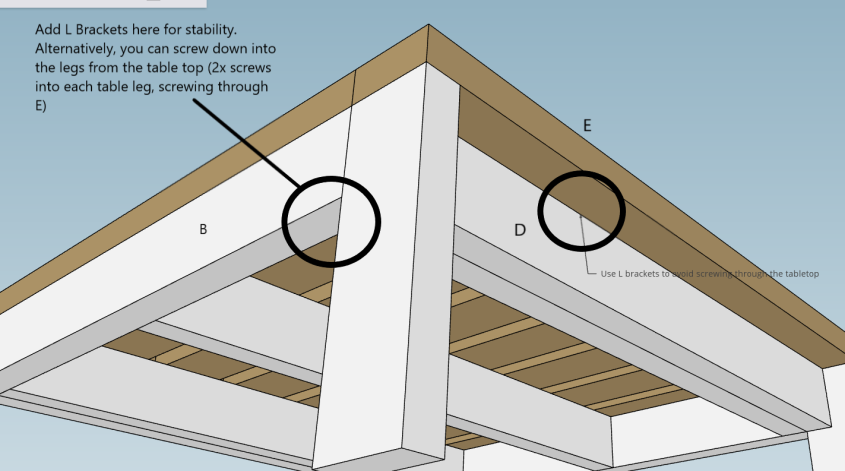
Fig. 5: Attach frame to underside of table top
Fig. 5a: You can use L brackets for added security
|



Michael Todd
This is altogether impressive.
2N, uNsiNkable
But you’re not surprised right?? I couldn’t resist writing instructions. Hahahaha!